Create your company
Set up a new company workspace in DropHaul in a few minutes.
Before you start
You need a DropHaul account. If you already run one company and want to add another (a second location, a separate legal entity), you can start this from inside DropHaul. You don't need a new sign-up.
Select your company name at the top of the sidebar to open the company switcher. Select your company's row again to expand it, then select Create Company.
Add your Company name. This is what your team and customers see across DropHaul, including on invoices.
Add a Business phone number. Customers see this on invoices and dispatch confirmations.
Pick your Timezone from the dropdown. DropHaul uses this for job schedules and reports.
Select Save Business.
What you'll see
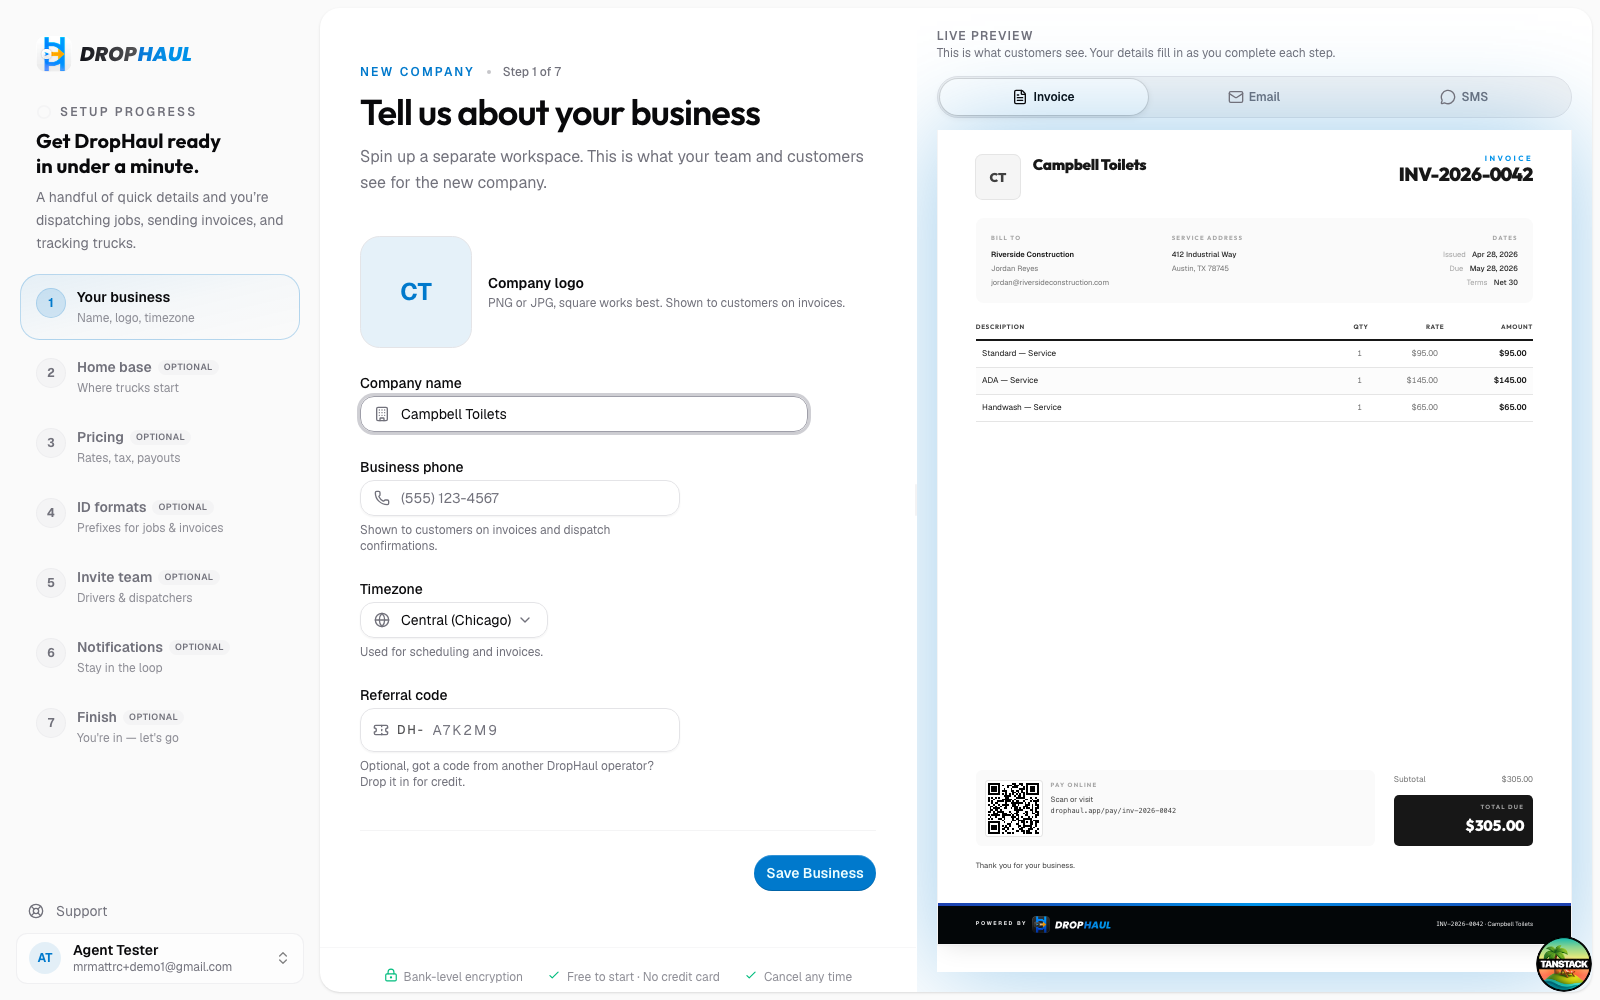
After you select Save Business, DropHaul takes you into the rest of setup (home base, pricing, ID formats, team invites). Each of those is optional, and you can select Skip on any of them to move on. On the last step, select Launch DropHaul to start using the new company right away. That button stays disabled until the required steps (your role and the company step) are complete.
You can add a Company logo here too. It shows on your invoices and in the company switcher, so it's worth doing now if you have one ready. Uploads are resized and converted to JPEG automatically.
If something's not right
- Save Business is greyed out: the company name field is empty. Add a name to continue.
- Wrong timezone after saving: open Settings → General for the company and change it there.
- Don't see Create Company: your role may not have permission to create companies. Ask an owner on your team to add it, or check the Team section in the sidebar.